
How to update a Bioschemas Profile with the Data Discovery Engine (DDE) Schema Playground
In this how-to, we will guide you through the necessary steps in order to update an existing Bioschemas profile
Next tutorial:
How to create a new draft profile
Update a Profile
You have come to a community consensus on changes needed to a profile that already exists. Congratulations! Now you have to update the new profile version on the Bioschemas website. Note, if you are comfortable with JSON schema and JSON-LD, you are welcome to copy, paste, and edit the JSON-LD files in the Bioschemas Specifications repository
Step 1 - Log in
- Open the DDE schema registry and Login to the DDE update tool via your GitHub account
- The DDE requires read access to find your repositories (so you can save to them) and write access in order for you to be able to export your updated profile (specification in JSON-LD format) to GitHub
- You should be at the registry page

Step 2 - Prepare the profile for update
2.1 Find the profile in the Registry
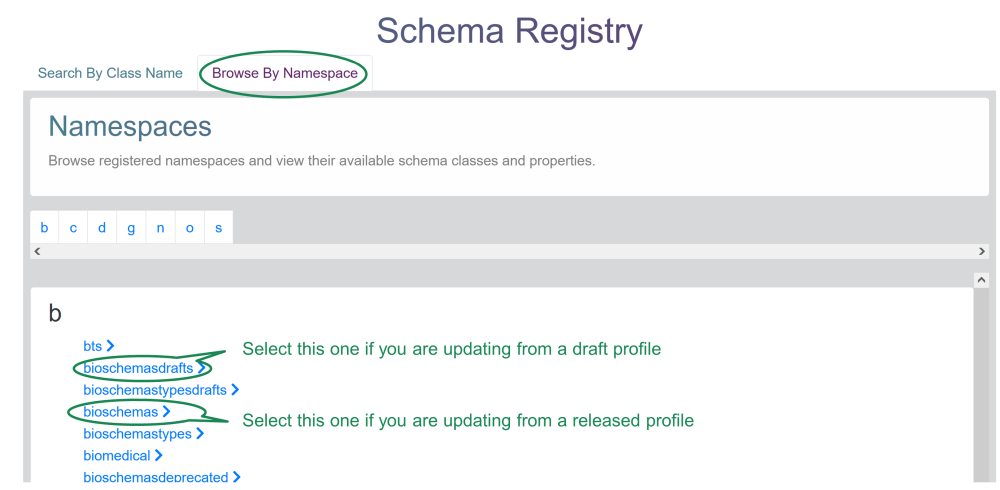
- On the Registry page, select “Browse By Namespace”
- Select ‘bioschemas’ or ‘bioschemasdraft’ depending on whether you are updating a release or draft profile. In this tutorial we will use examples corresponding to updating a draft profile.
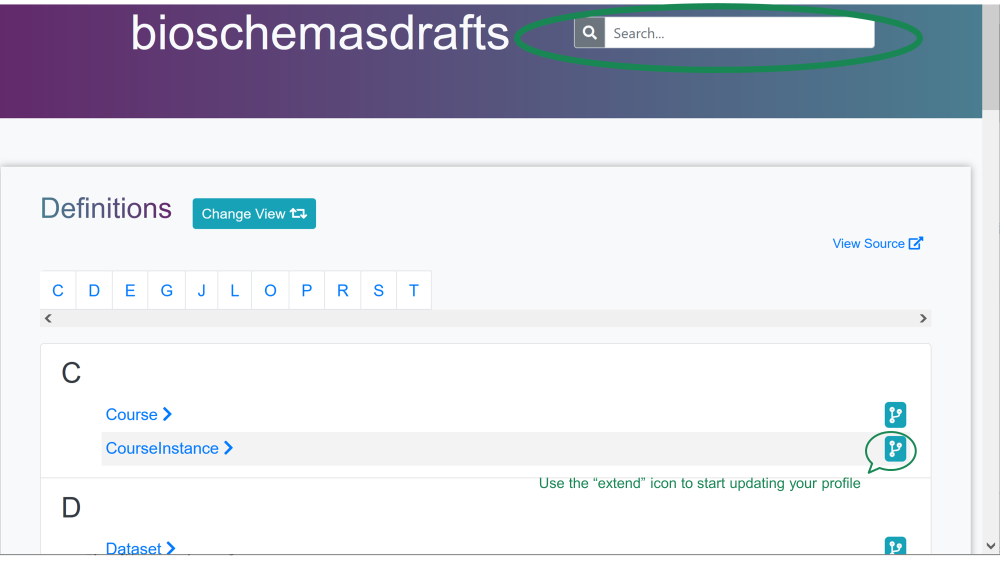
- Search for the name of the profile to be updated
- Click ‘extend’ (icon on the right at the end of the row corresponding to the profile name)
2.2 Follow the prompts to update your profile
- Create a temporary namespace that will help us identify your working space.
- Fill in the form to create the updated profile version including the name of the profile and a description. The description should include:
- The description of the profile as determined by the community
- The version of the profile
- Any descriptions of changes between versions
- The name of the person who prepared the changes
You will not be able to change this information on the next steps so make sure it is correct before moving on.

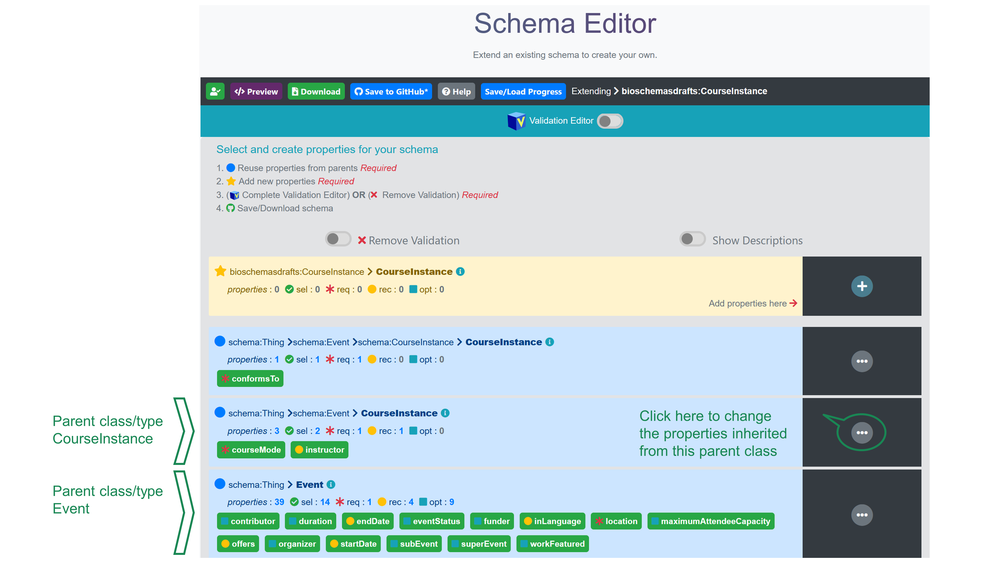
2.3 Select minimum, recommended and optional properties of your profile
- You can select properties from all parent classes. Each parent class will be displayed on a blue box.
- The minimum (aka requested/mandatory), recommended, and optional properties are automatically shown from the latest available profile you selected in 2.1.
- You can select additional properties or unselect those that are no longer needed for the updated version.
- To update properties for a particular parent class, click on the “…” icon on the right of that parent class. This will open up a list of all availables properties for this class.
- If a property should be included in the profile:
- select it with the checkbox icon
- define its marginality (red star for minimum, yellow circle for recommended, turquoise square for optional)
- If a property should NOT be part of the profile:
- deselect it with the checkbox icon - i.e., checkbox icon should be gray
- Change the selection checkbox icon and marginality buttons as needed for each available property
- If a property should be included in the profile:
- Special property: conformsTo
- “Uncheck” conformsTo as it will be added automatically via a script
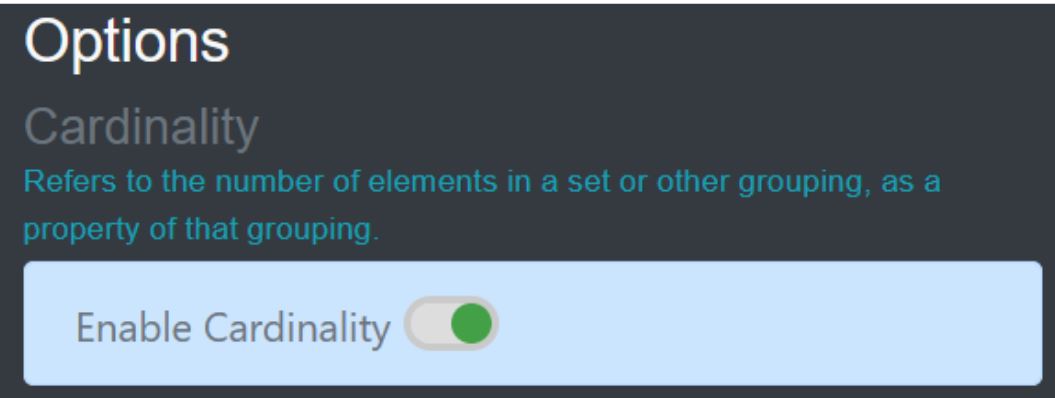
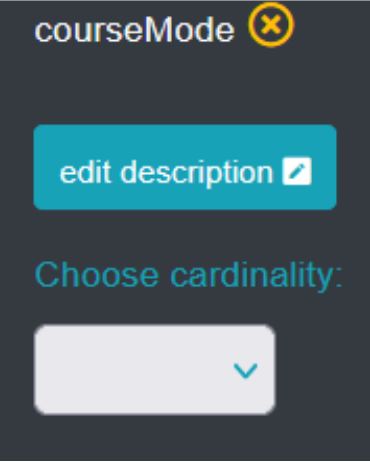
2.4 Modify cardinality and description of properties selected for your profile
- You can modify the cardinality of those properties that you have selected for your profile. To activate the cardinality selection, please look for the “Validation Editor” option on the top of your profile and enable it
- On the Validation View, make sure that “Cardinality” is enabled, you will find this option on the top left
- You will have to select the cardinality for each property
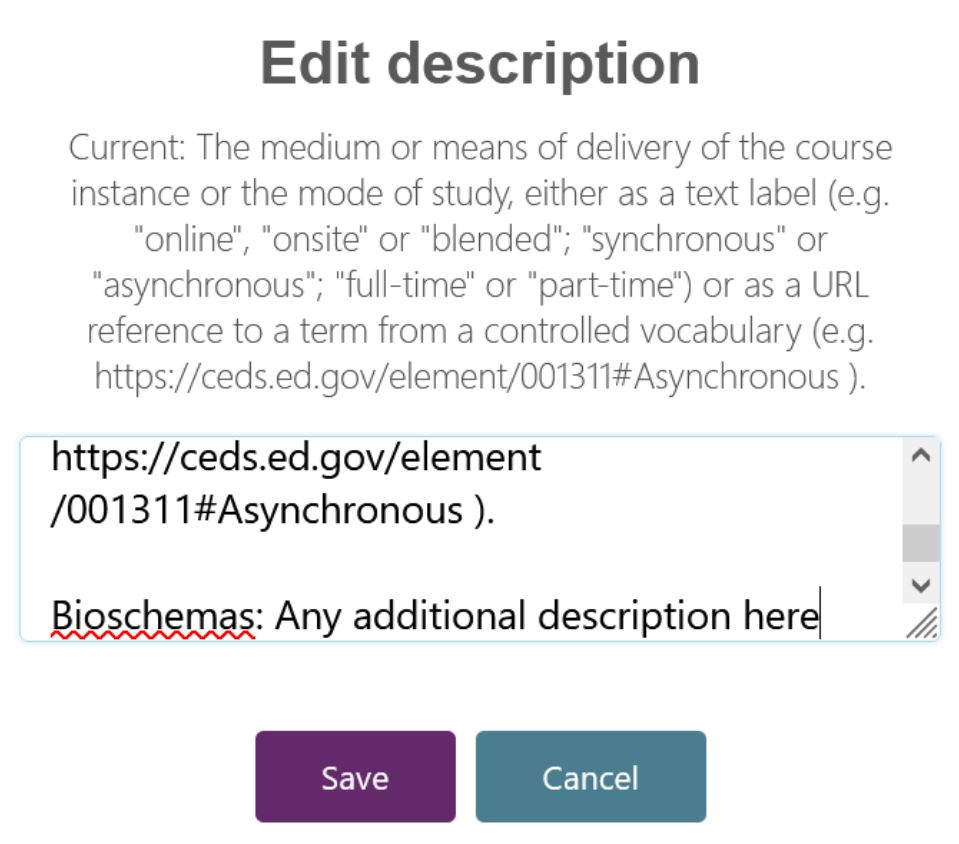
- You can also modify the description. We suggest doing so only when you need to add a note on how the property should be used for the Bioschemas use case, otherwise leave it as it comes from schema.org. Remember to always copy the portion corresponding to the original text in schema.org and then, separated by an empty line, add the usage note for Bioschemas. The usage note should include any recommendation on existing controlled vocabularies for the property.
- Saving, restoring and submitting work on a property
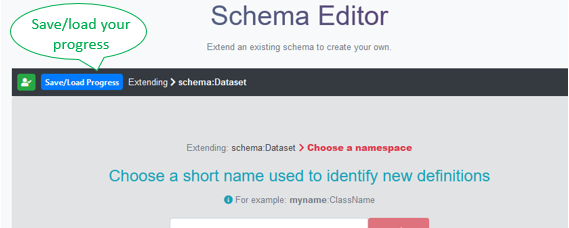
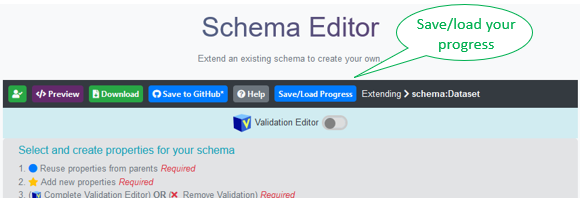
- Save your work locally regularly (it will be saved to your browser’s data so clearing your browser’s data may cause your files to be lost)
- Click on “save/load progress” on the top dark gray bar
- Use the “Select Action” drop down menu to ‘save’ your work
- Save your work locally regularly (it will be saved to your browser’s data so clearing your browser’s data may cause your files to be lost)
- The DDE editor will tell you if there is any property that still need validation rules

- Add or modify existing validation rules as needed via the drag-and-drop interface in the DDE validation editor
2.5 Download / Save your JSON-LD schema
- Downloading your DDE-generated schema
- Click the download button
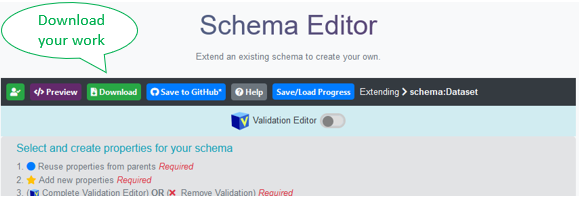
- Name your DDE-generated file, and click download
- Your JSON-LD file should follow the appropriate naming convention
(Profile Name)_v(version)-(DRAFT|RELEASE).(json|jsonld)- example 1 - LabProtocol_v0.6-DRAFT.json
- example 2 - Gene_v1.0-RELEASE.json
- Interpreting the validation warnings
- The DDE will automatically check your schema for JSON validation rules and give warnings if they are missing
- Revisit the DDE validation editor and add JSON Schema validation rules to the properties that lack them
Step 3 - Save your JSON-LD to the Bioschemas Specification Repository and create a pull request
- Go to the Bioschemas Specification repository
- Create a new branch or fork the repository
- In your branch or fork, and find your specification
- Add your JSON-LD to the
jsonlddirectory for your specification - Create a pull request for your fork or branch
- Include any issues you encountered from your test that you were unable to address
Keywords: schemaorg, markup, structured data, bioschemas
Topics:
Audience:
- People interested in updating a Bioschemas profile
Authors:
License: CC-BY 4.0
Version: 0.2
Last Modified: 25 October 2022
Next tutorial:
How to create a new draft profile